The basement is a unique area in your house. It is usually portrayed in films as that one space where someone who has secrets will try to keep them. It is usually dark, scary, and full of rats and roaches. In reality, it’s actually a space with a lot of potential. It’s not just cold concrete down there with so many stored stuff. Although it is the lowest floor in your home, you can actually tap its potential by learning how to utilize it.
In this article, we’ll be talking about some ways in finishing a basement. Trust us, you’ll love it when it’s done!

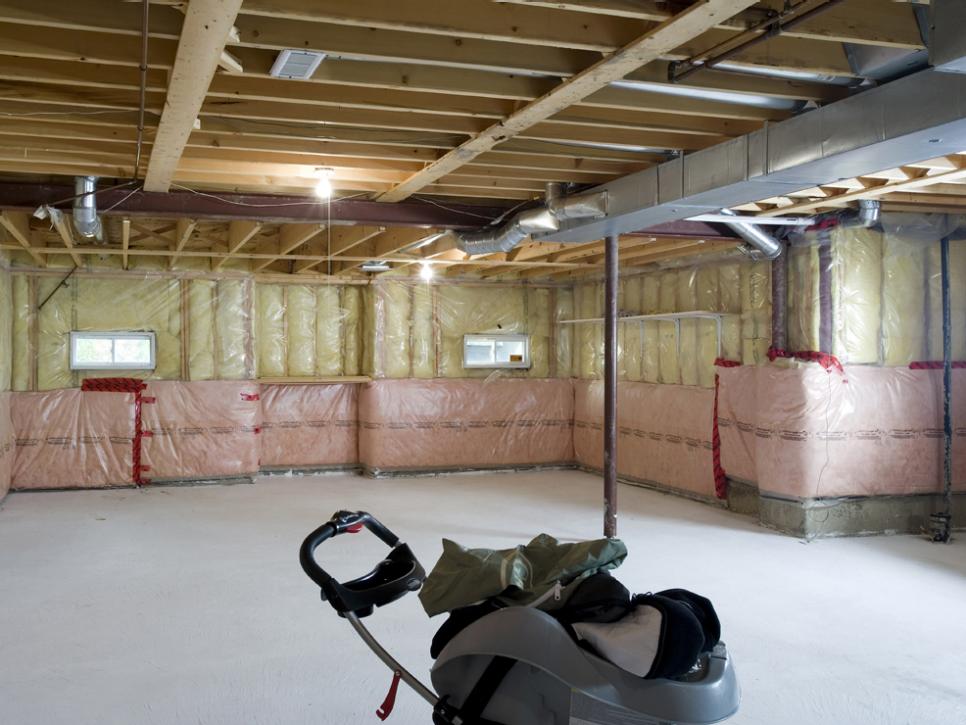
(photo credit: HouseLogic.com)
Here’s the first set of tips from an expert, in the article “Basement Finishing Tips” for FamilyHandyman.com:
First, Dry it Up
If you have a damp or wet basement, you have to fix it before you start any finishing work. The good news is that most water problems can be remedied by two measures: grading the soil to slope away from the foundation and adding or repairing gutters and downspouts. If these steps don’t work, you’ll have to take more extreme measures like adding exterior drain tile and waterproofing the walls or adding interior drain tile that empties into a sump basket with a pump. Eliminating water problems is time consuming and expensive, but it’s critical to prevent a moldy and ruined finished basement.
Seal the Rim Joists
Uninsulated rim joists are huge energy losers. Now’s the time to insulate and seal your rim joists. One option is to seal the rim joists with rigid insulation cut to fit. We recommend a minimum of 2-in.-thick extruded polystyrene, but check your local codes to see what’s required. If you have a table saw, use it to cut strips equal to the depth of your joists. Then use a fine-tooth handsaw, utility knife or miter saw to cut the strips to length. Fill small gaps with caulk, and larger ones with expanding spray foam from a can.
Install Drainage Mats for a Warmer, Drier Floor
Plastic drainage mats, or dimple mats, allow air to circulate under the flooring and provide a moisture barrier. They also provide an insulating layer of air that separates the floor from cold concrete, reducing the potential for moisture damage from condensation or water vapor migrating through the concrete.
Vary Your Lighting Choices
For the most interesting space, include several kinds of lighting in your plan. Start with good general illumination for times when you want a brightly lit room. Plan to add a dimmer switch to control the amount of light. Recessed can lights, ceiling fixtures and fluorescent “pillow” lights are a few types of general lighting. If you’re worried about noise traveling upstairs, don’t use recessed can lights.
Get more from this article about basement finishing by clicking the link.
Based on the tips given above, one of the most important aspects in successfully finishing your basement is to take care of the floor, making sure it is dry and clean. You can’t just jump to decorating and furnishing without first making sure that the floor is already fitted and perfect to be labeled as livable.
(photo credit: HGTV.com)
Our next set of tips meanwhile comes from BHG.com, in a blog post titled “Smart Tips for Finished Basements.”
Know Building Codes
Basement rooms must be at least 7X7 feet and have a minimum ceiling height of 84 inches over 50 percent of the floor area. Bathrooms, hallways, and task areas can have ceilings that dip as low as 76 inches in some spots. All bedrooms window need to be at least 20 inches wide and 24 inches high, or 5.7 square feet, and no more than 44 inches off the floor. Having a room that matches these dimensions will ensure that people can walk around comfortably and escape in case of an emergency.
Make an Entrance
Consider your stairway location and how it leads you into the basement space. Ideally the stairs will lead to a family room or a main gathering area. Stair risers should be no more than 8 inches tall, and the treads must be at least 9 inches deep. Although regulations vary from region to region, most require that stairs have guardrails at least 34 inches high and that the guardrails must have intermediate rails or posts or other ornamental fill that will not allow objects 4 inches in diameter or larger to pass.
Bring in the Light
Bringing in natural light is one of the biggest challenges when creating a basement room. Window wells are the most common solution where the window-opening height is below ground level. In case of an emergency, you can climb out the window and up the well. Choose window well locations carefully so you can make them as wide and deep as possible. The wider and deeper the well, the greater the amount of sunlight flowing into the basement.
Have an Escape Route
Check your local building codes to determine if they require egress windows for a basement bedroom. Egress windows must be large enough for a firefighter in full gear to get into a burning house and for occupants to safely escape if the stairway is blocked. If you can’t install egress windows, consider adding hinged outside access doors.
Read more and get additional tips by visiting this link.
In the end, although you don’t really pay that much attention to your basement, you need to realize that it can actually be transformed into something that can be used as a typical room – a room that’s similar in look, feel, and functionality to that of your rooms above it. However, this type of DIY home improvement project will need tons of effort and time to make it successful. So if you happen to be someone who isn’t really a fan of doing your own projects at home, then this isn’t for you.
No comments:
Post a Comment